Artificial intelligence, advanced development tools, and modern hosting options are putting headless WordPress back on the radar for designers and developers alike. This new chapter is reshaping how distributed digital experiences are conceived, developed, and launched.
In this guide, we’ll walk through building a modern website using Lovable, an AI-powered frontend builder, with a headless WordPress backend.
What’s happening today hints at the future of WordPress, in both headless and traditional formats: a more collaborative, open, and AI-supported approach to building digital experiences that blend robust content management with creative design control.
Table of Contents
Understanding headless WordPress
Getting started with a headless WordPress setup is easier than it sounds. Think of it as splitting WordPress into two clear parts:
- Backend – WordPress is used for managing your site’s content, media, and data—just like always.
- Frontend – A separate application is responsible for displaying and interacting with that content.
This separation lets you use WordPress for what it does best while opening up design and development possibilities with frameworks such as React or Vue. It’s essentially harnessing the strengths of WordPress and amplifying them with today’s frontend technology.
To put it another way: WordPress manages your site’s structure, while your frontend determines the visual presentation and behavior.
Why Lovable?
Is headless WordPress a must for every scenario? Not always. For many sites, classic WordPress remains a fast, convenient option. But if you need greater flexibility, rapid iteration, or want to create web apps beyond traditional themes, going headless becomes compelling.
In this project, we chose Lovable, an AI-assisted platform for building, editing, and managing frontend code. It leverages technologies like React, Tailwind CSS, and Vite, using AI prompts to configure layouts, styles, and interactive components.
Think of Lovable not as your final frontend—but as the workspace where your frontend comes to life and evolves.
Here’s why Lovable works well for an experiment like this:
- Version control alignment: Effortlessly synchronize your work with GitHub, GitLab, or Bitbucket.
- Multi-platform design: Create for web, mobile, or kiosks—all powered by one WordPress backend.
- Rapid iterations: Make layout, style, or component changes in moments using AI-driven prompts.
- Enhanced security: Frontend stays decoupled—there’s no direct database exposure.
- Static build option: Deploy as static HTML, CSS, and JavaScript for greater speed and dependability.
As with any architecture, there are trade-offs. Managing multiple layers can make debugging trickier, and plugins that output custom frontend markup may need extra integration via APIs. Still, for most content-driven or static sites, the Lovable and WordPress pairing is a fast, forward-thinking way to embrace headless technology.
Getting started
Before you start building, get both key components in place: Lovable for frontend development and WordPress as your backend.
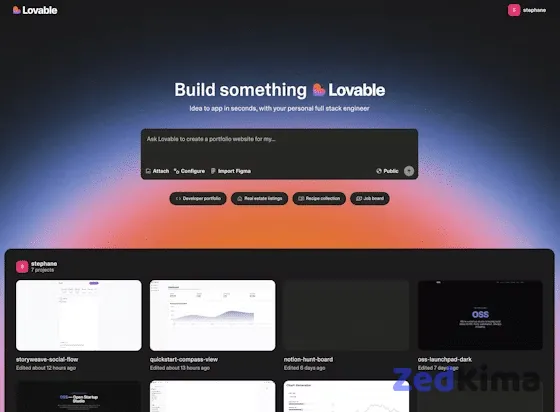
Step 1: Create a Lovable project
Visit lovable.dev and register for a free account. In your dashboard, spin up a new project with a brief prompt.
The chat-based interface feels natural—just type your thoughts as you would to a collaborator. For instance, start with a straightforward question:
How do we start building a frontend with WordPress on the backend?Lovable will respond with step-by-step guidance and outline your choices:
Building a React frontend with WordPress as a headless CMS is a solid approach.
You can use the built-in WordPress REST API or install WPGraphQL for more complex data queries.
This introductory conversation gives you a quick sense of possibilities and clarifies how your frontend can interact with WordPress.
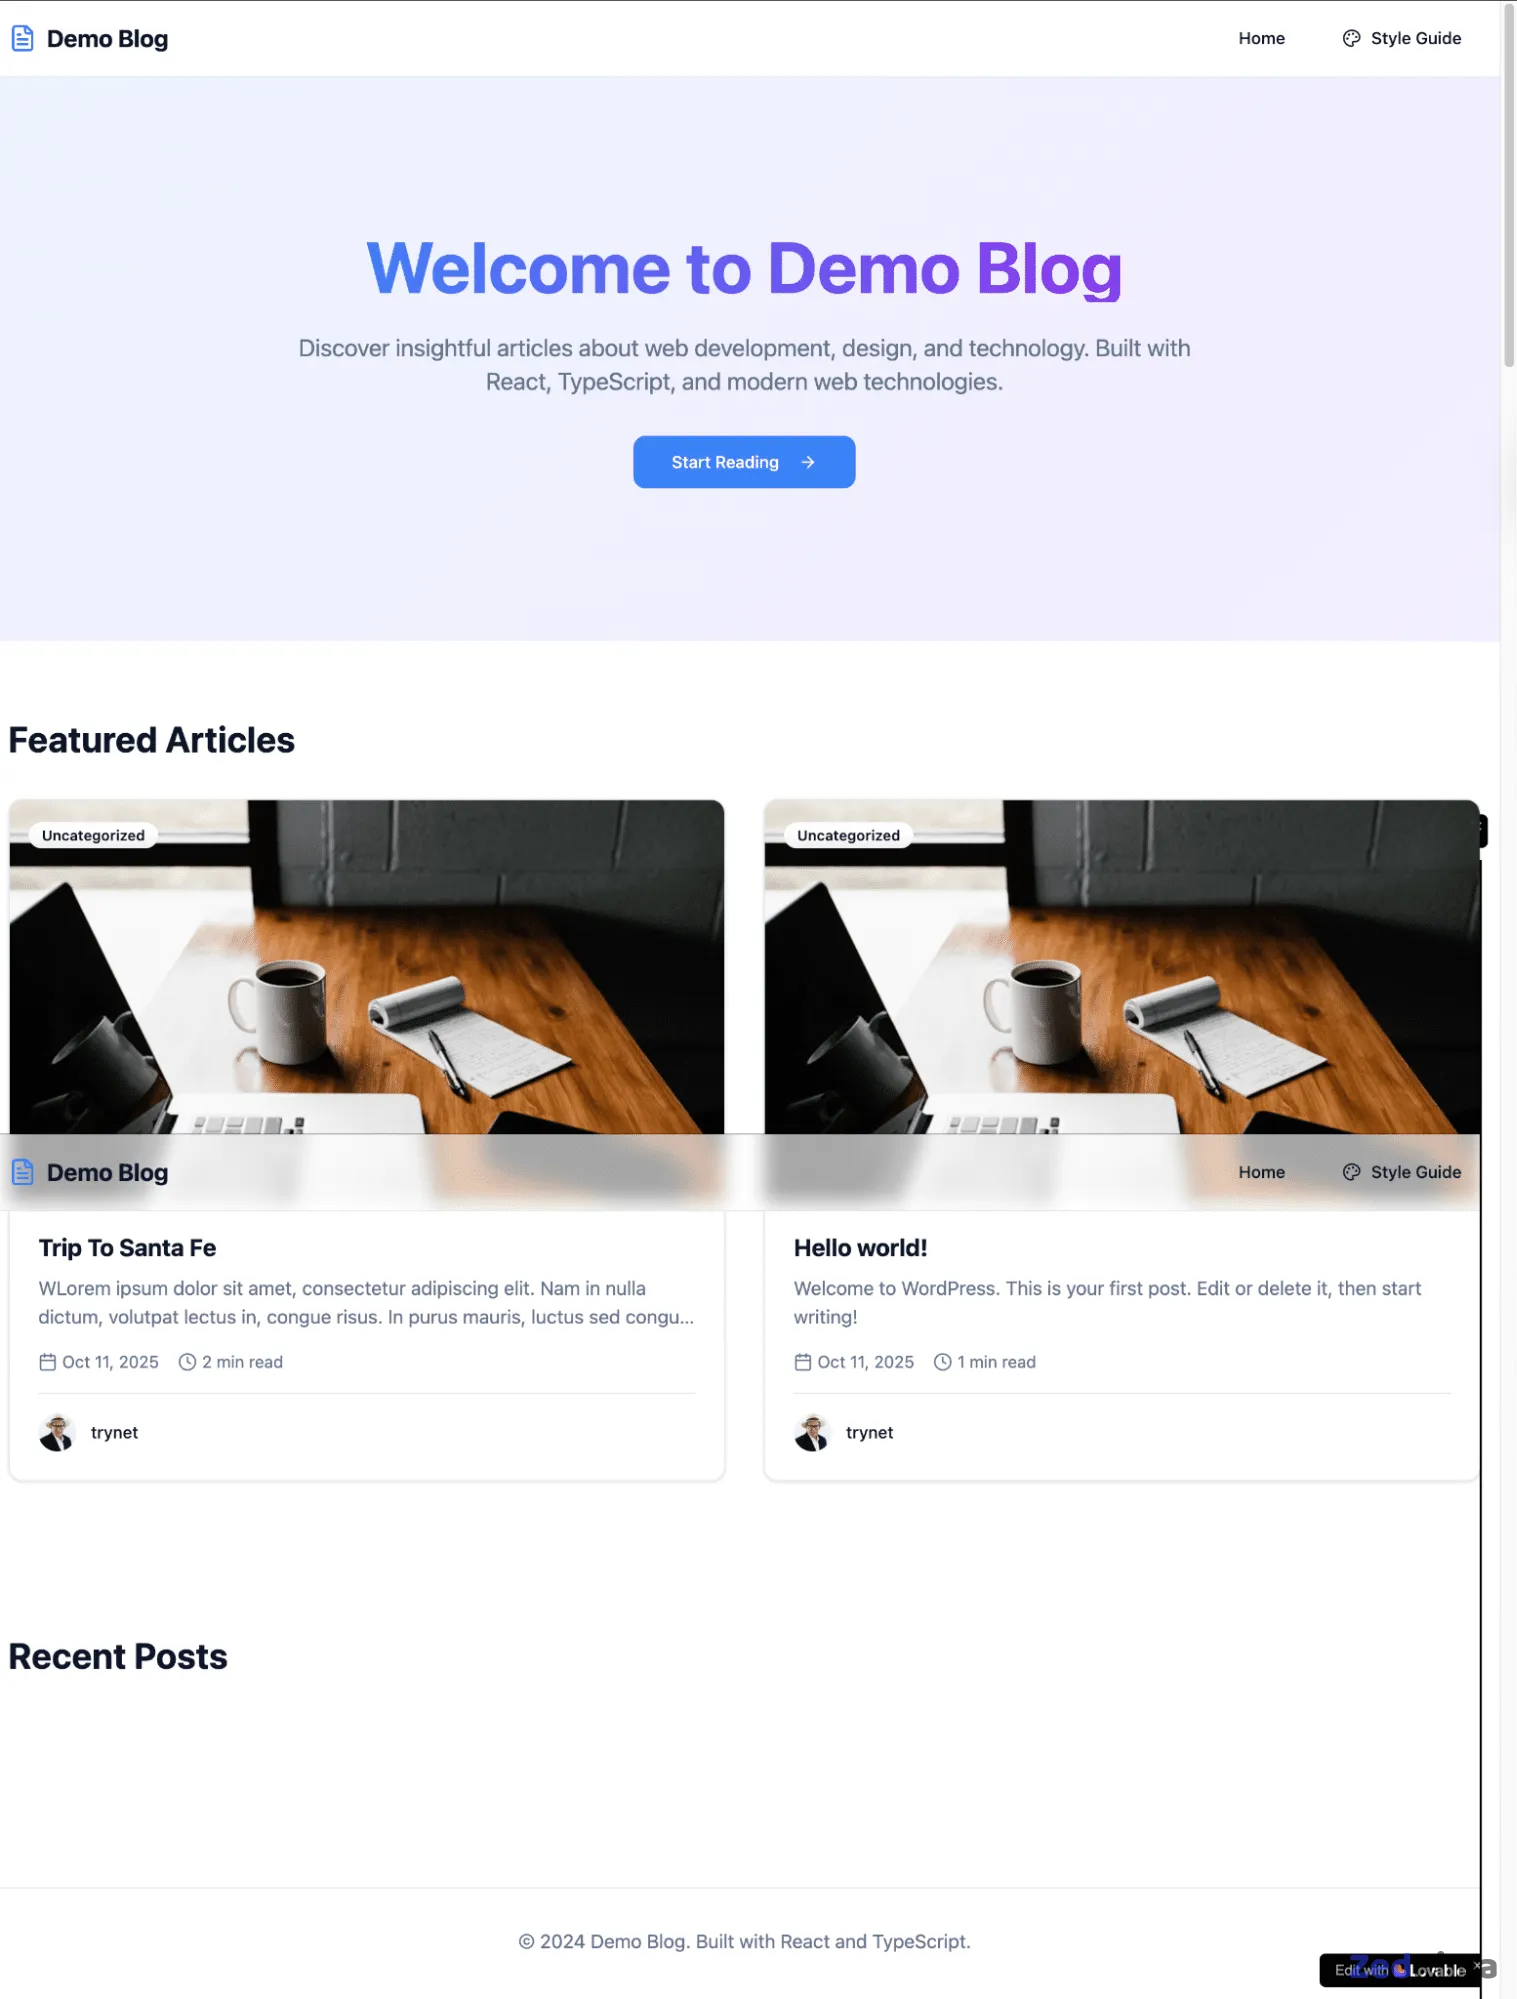
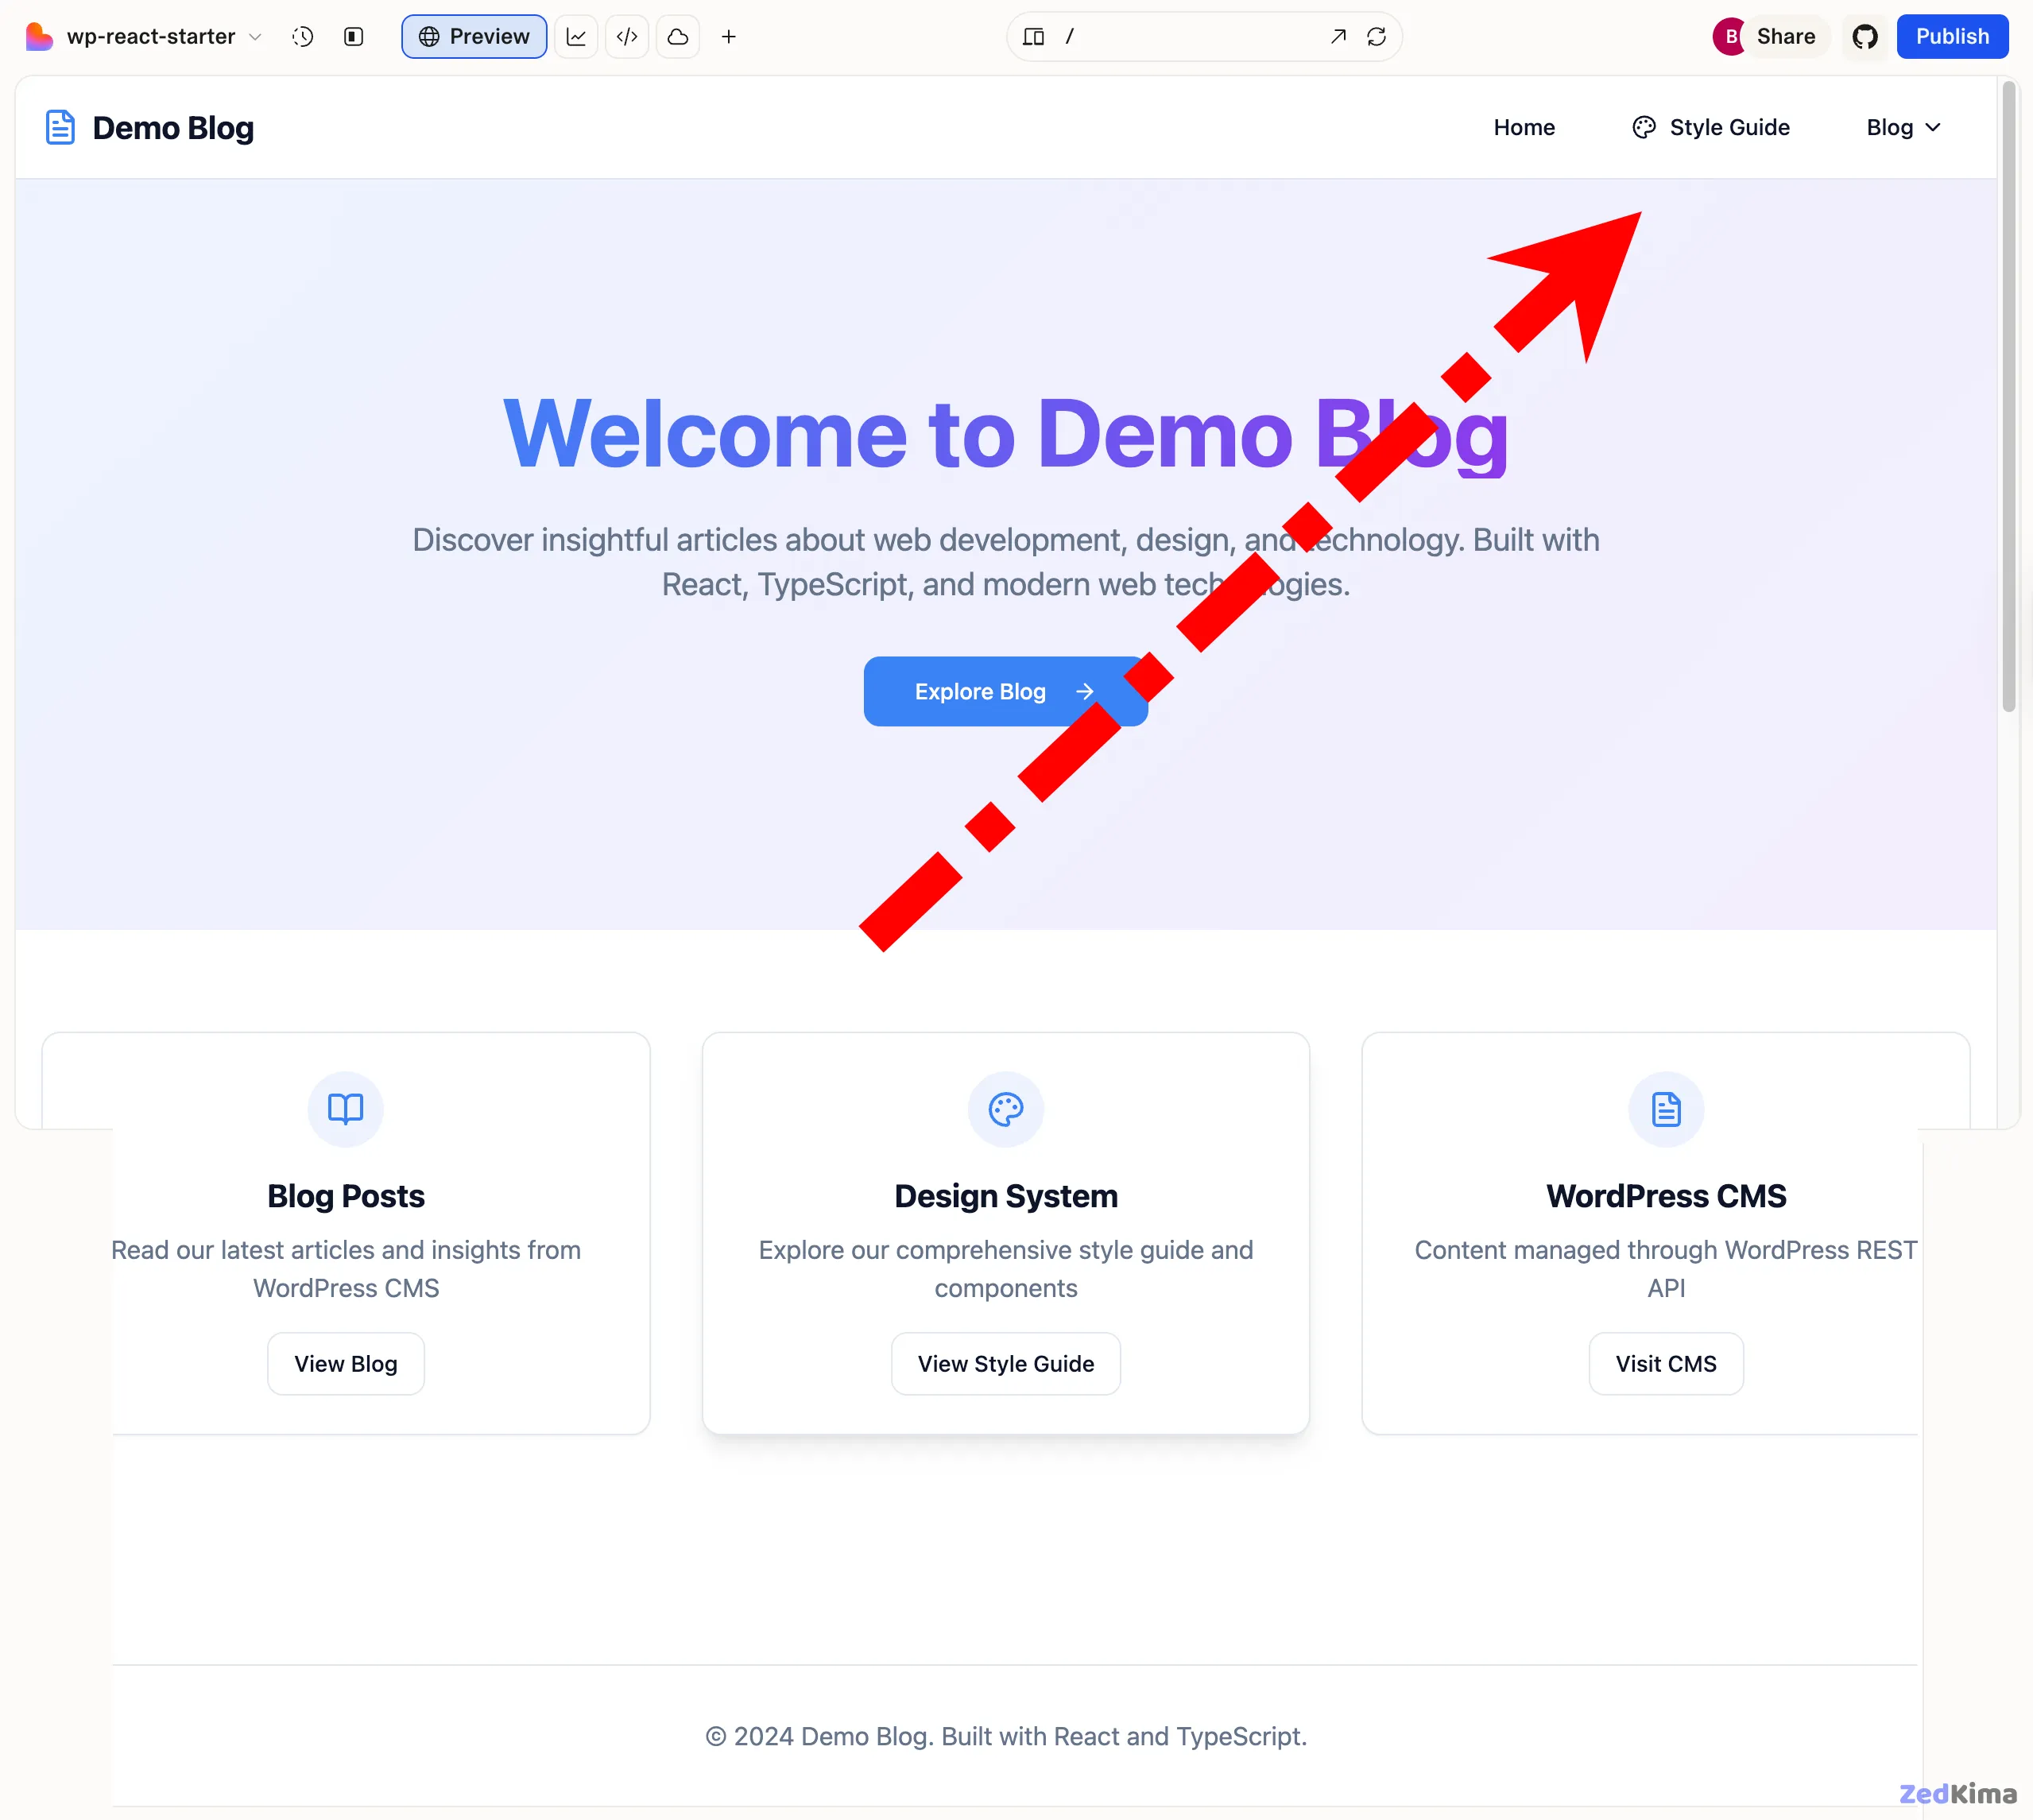
You can narrow down the scope by asking Lovable to keep the site simple:
Let's keep it simple. We just want to build a demo blog site and have a page to serve as a dynamic style guide.Lovable responds quickly, generating a clean demo site along with a Style Guide page for managing global design changes.
From there, the process is interactive. You and Lovable exchange details and instructions, moving the project forward. At certain points, Lovable will prompt you for key setup information, such as:
1. Do you have a WordPress site URL? (e.g., https://yoursite.com)
2. Is the WordPress REST API publicly accessible?
3. What WordPress content should map to your blog? (posts, pages, or custom post types?)
4. Are there custom fields you’d like to fetch? (e.g., read time or featured flag)
Once you’ve provided these essentials, Lovable can set up the integration logic that links your frontend to the WordPress backend.
Step 2: Set up WordPress
To connect real content, you’ll first need a running WordPress site acting as your backend. Here’s where you’ll manage all your posts, pages, and media.
For hassle-free operation and strong performance, use a reliable WordPress host. Create a new WordPress site and you’ll receive a temporary subdomain such as:
https://your-site.test.cloud/After launching your site, verify public access to the REST API by navigating to:
https://your-site.test.cloud/wp-json/wp/v2/postsIf you see a JSON response with post data, your backend is set up and ready to go.
Step 3: Connect WordPress to Lovable
After your WordPress site is running and the REST API is accessible, it’s time to connect the backend with your Lovable project—bringing your content and design together.
In the Lovable chat, simply ask:
Ok, how do we connect your frontend to our WordPress CMS?Lovable will lay out a clear connection plan and specify what’s needed:
You’ll connect to your WordPress backend using its REST API.
What you’ll need:
1. WordPress REST API (built-in, available at yoursite.com/wp-json/wp/v2/posts)
2. A CORS plugin if your frontend is on a different domain
3. (Optional) ACF or custom fields for extra data
It will summarize the process on both sides:
- WordPress: Ensure REST API is enabled (usually it is).
- Frontend: Swap out any static blog data for API requests to WordPress, add a service for fetching content, and handle loading states gracefully.
Lovable will often illustrate this with examples:
const { data: posts } = useQuery({
  queryKey: ['posts'],
  queryFn: async () => {
    const response = await fetch('https://your-site.test.cloud/wp-json/wp/v2/posts');
    return response.json();
  }
});
With your WordPress site URL, Lovable completes the setup, giving you a frontend that displays live WordPress posts.
Just like that, the tool verifies your integration, and your headless site now seamlessly moves content from WordPress into Lovable’s frontend environment.
Styling and design system
With your WordPress integration active, the next step is customizing your site’s look and feel. At first, default styles come from Tailwind CSS and basic browser rules, resulting in a clean slate—ready for your unique touch.
Get started by prompting Lovable directly:
Is all styling currently provided by TailwindCSS and the User Agent?Lovable provides an explanation:
Yes. All styling is currently provided by TailwindCSS (via index.css and tailwind.config.ts) and the User Agent's default styles. The App.css file exists but isn’t imported anywhere.Now you can tweak your site’s layout and navigation. For instance, request:
Connect to all pages, posts, and media, and set up a header navigation as follows:
Home
Style Guide
Blog
    Trip To Santa Fe
    Hello World
Make the Home page the root of the site.
Lovable reorganizes your site routes, linking blog posts dynamically in a Blog dropdown. Navigation flows between Home, Blog, and the Dynamic Style Guide—your main hub for design updates.
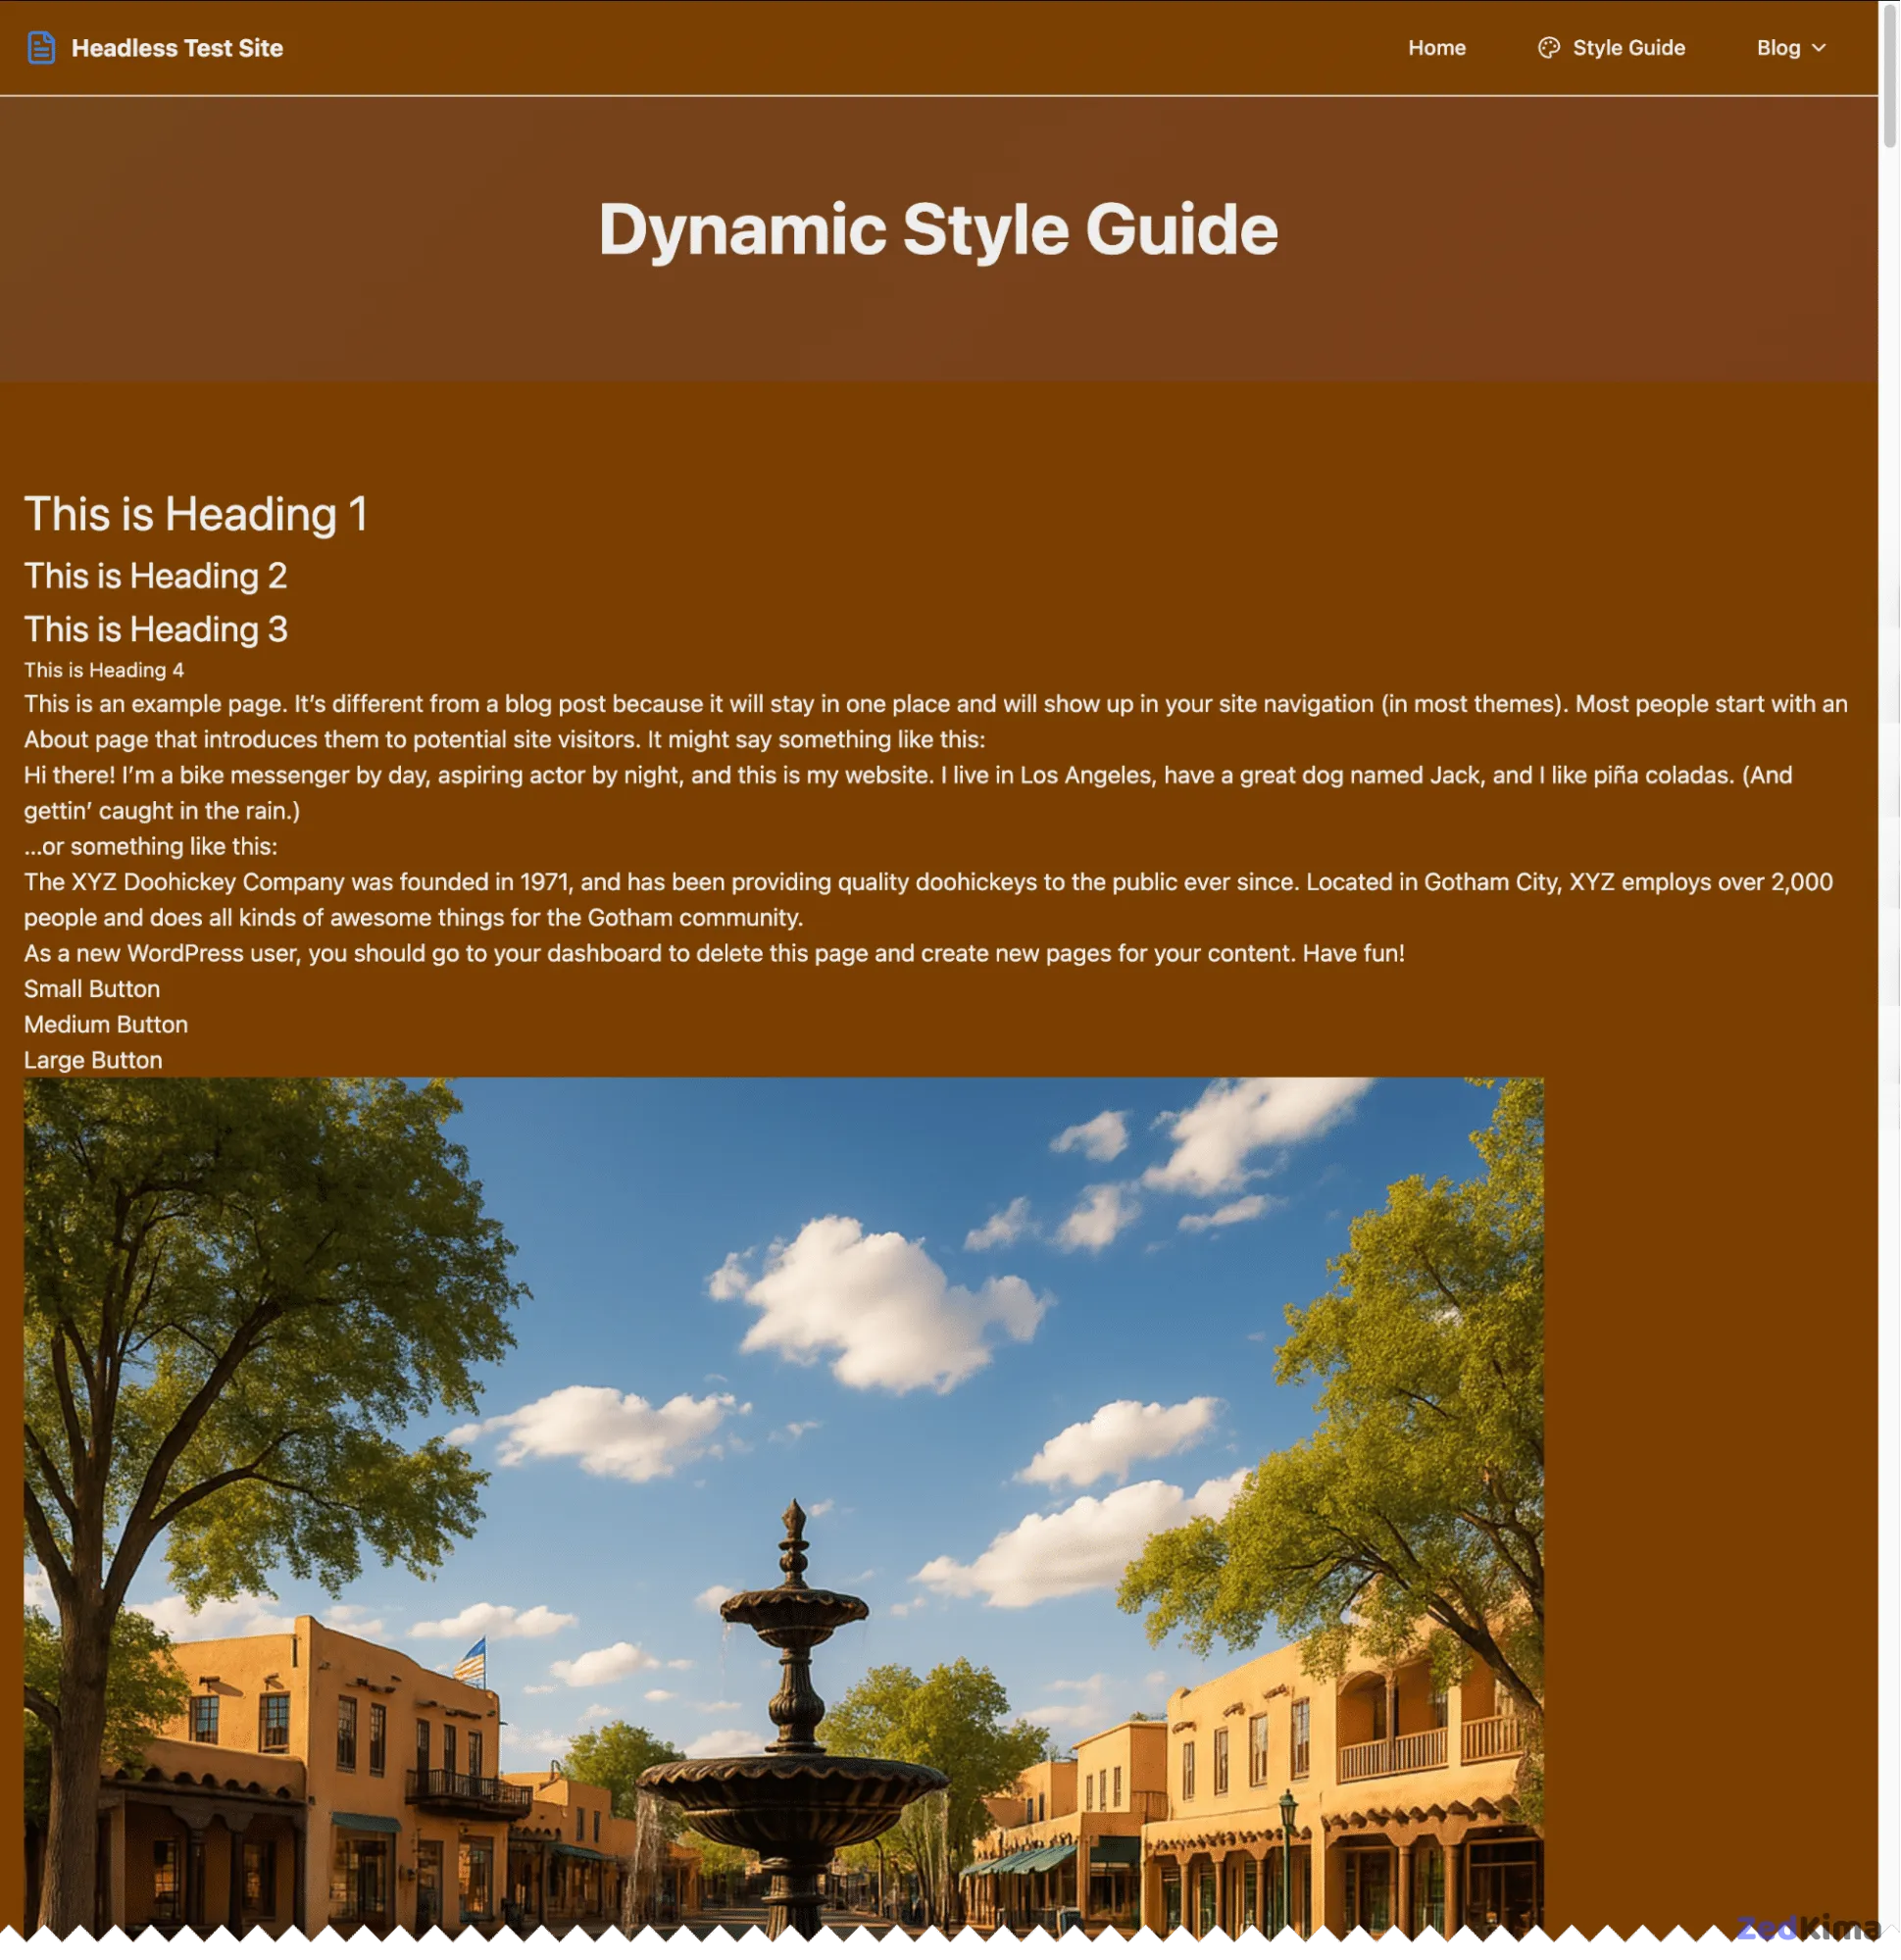
Working with the dynamic style guide
This is where you manage site-wide design. Any update here instantly applies across all pages.
To set your brand’s feel, start with a base color palette and typography:
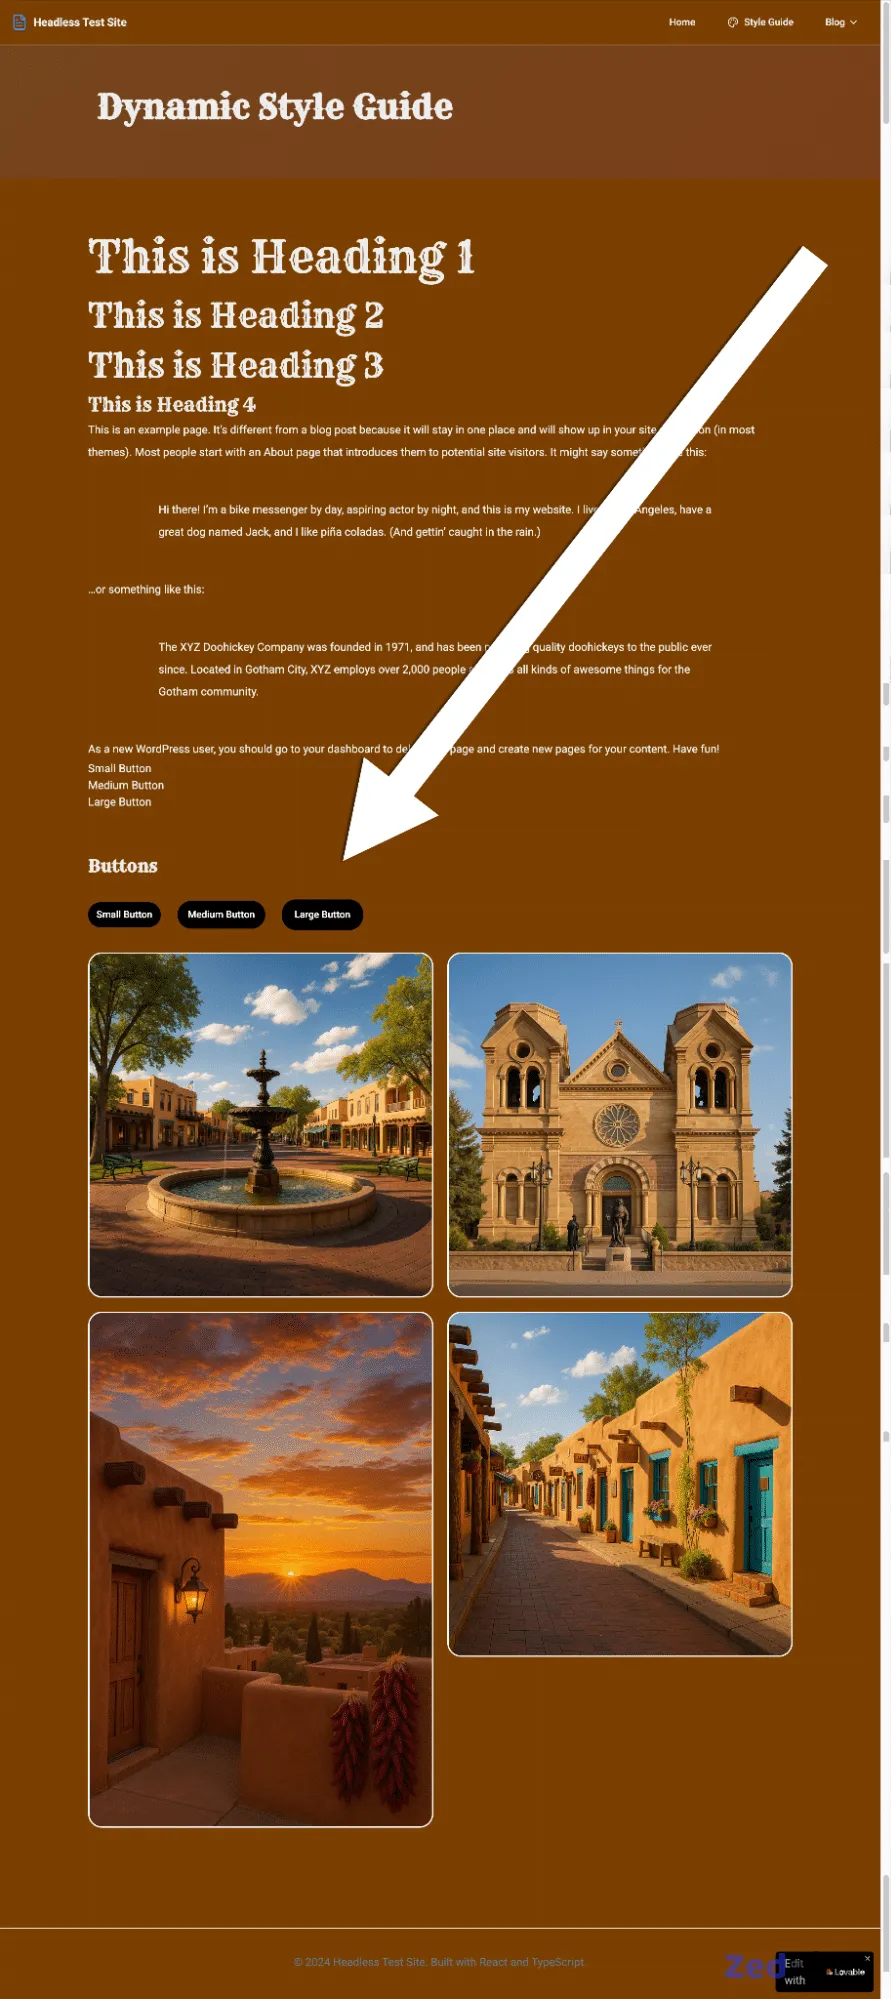
Set page background color to #7B3F00.
Set all text color to #eee.
Heading 1 = 2rem
Heading 2 = 1.5rem
Heading 3 = 1.25rem
Heading 4 = 0.84375rem
All other text = 1rem
Lovable enforces those choices, updating your background to warm browns, text to soft grays, and standardizing the typography hierarchy.
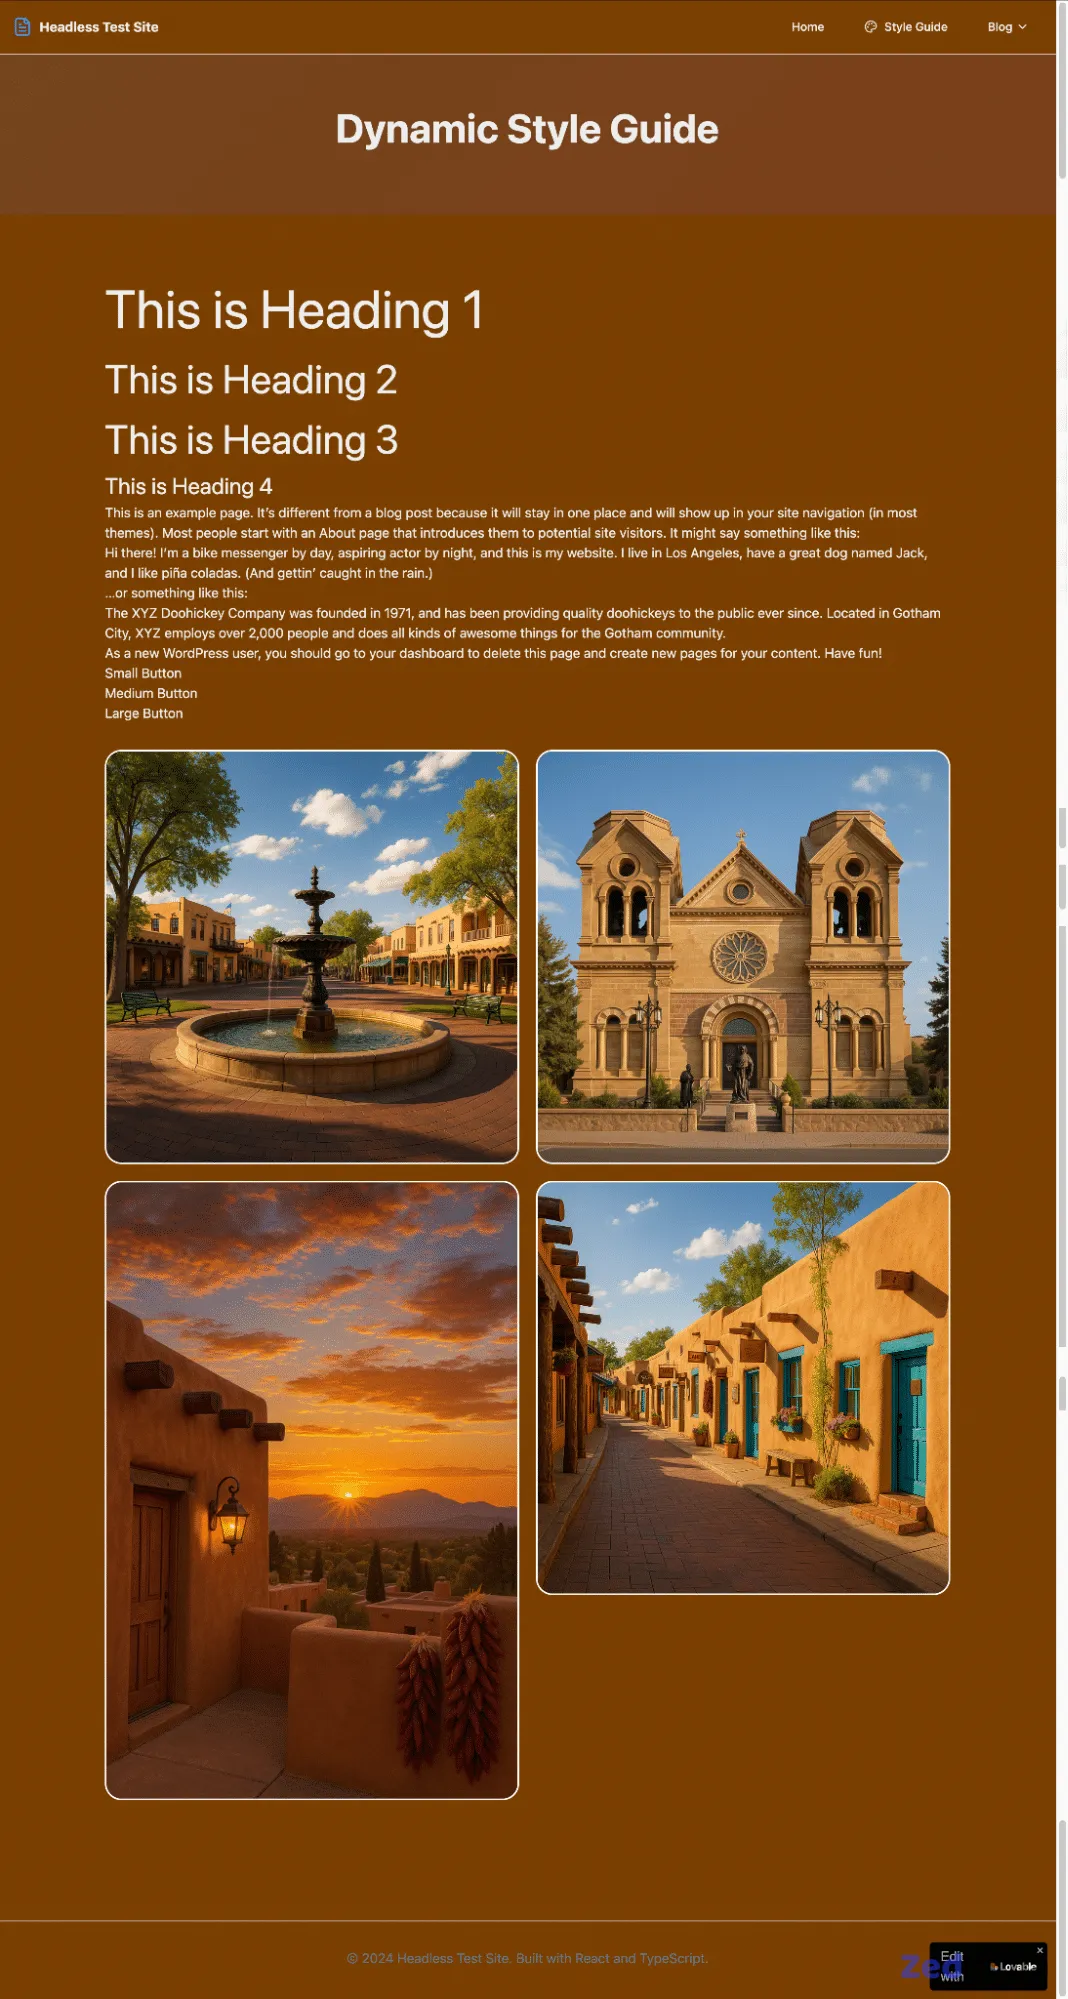
You can keep evolving the site’s design—for example:
Double the size of all headings.
Add 10% left and right margin to the page.
Create a 2x2 image gallery with 20px spacing, rounded corners (20px radius), and a 2px solid white border.
Lovable arranges the gallery layout as requested, and you’ll see the update instantly.
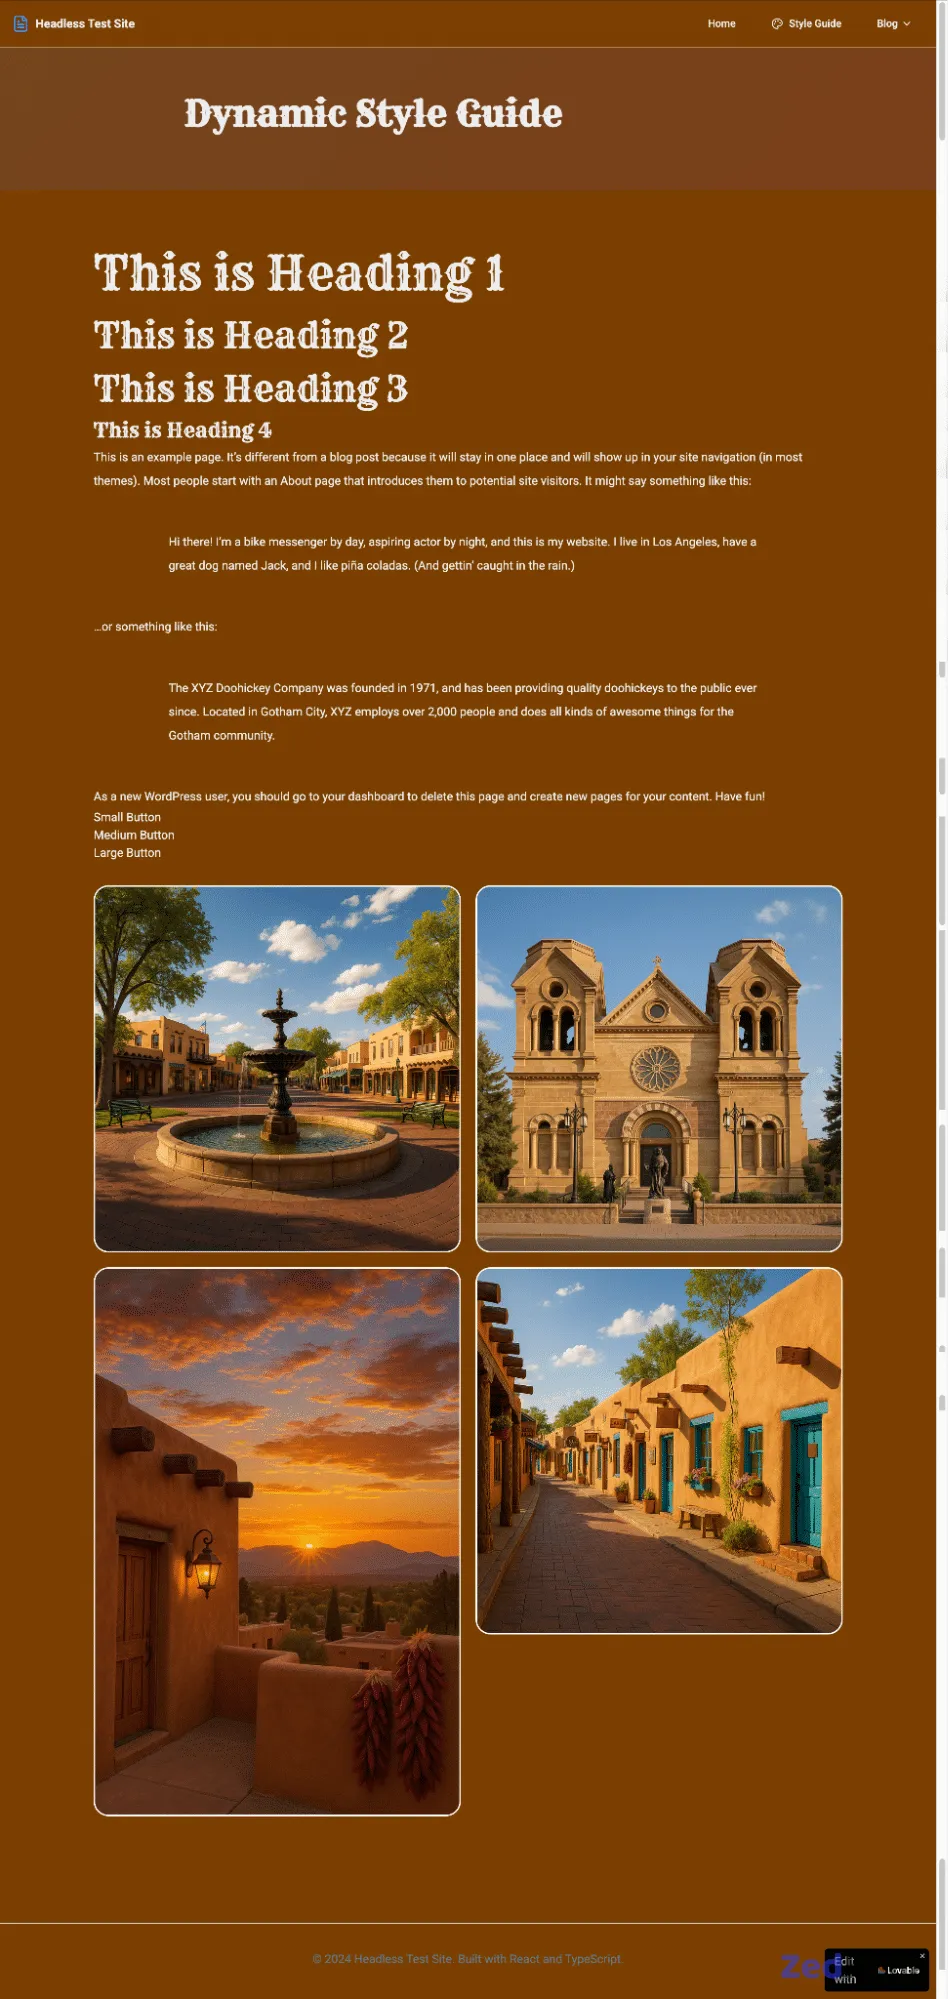
Global font and spacing adjustments
To further refine your design, apply consistent site-wide font and spacing rules:
Align the page title to the left.
Use the Cowboy (Rye) font for all headings and Roboto for all other text.
Double the line height for all paragraphs and quote elements.
Add 5% top/bottom and 10% left/right margins to the quote block.
Lovable promptly updates font styles, line heights, and margins for a polished look. Also don’t miss this related post → Top Google Fonts for your website
If you spot a concern—maybe a title isn’t properly aligned—ask Lovable to review:
The page title isn’t aligned left. Why?Lovable will break down the reason and suggest fixes:
The container has mx-auto, which centers it. I’ll remove that for true left alignment.Defining global button styles
Unify your button designs easily. In the Style Guide, prompt Lovable to create several button sizes with clear hover interactions:
1. Buttons should be rectangular.
2. Use a black background with white text, and invert on hover.
3. The medium button is 125% the width of the small one; the large is 150%.
4. Add 20px border radius.
If you don’t see the buttons, Lovable can add a visual preview section, then apply your custom button styles site-wide.
Here’s a sample of CSS output that you can also use in WordPress if needed:
.wp-button {
  background: #000;
  color: #fff;
  border-radius: 20px;
  padding: 0.5rem 0.9375rem;
  transition: all 0.3s ease;
}

.wp-button:hover {
  background: #fff;
  color: #000;
}

.wp-button-sm { width: 100%; }
.wp-button-md { width: 125%; }
.wp-button-lg { width: 150%; }
Lovable will guide you on using these styles in your WordPress theme—just copy variables to your theme’s stylesheet and use the .wp-button classes within the block editor or in your template files.
Deployment
Once your headless site is styled and content is flowing, it’s time to bring it online.
Lovable projects are portable, so you can push your frontend code to any Git-based service for deployment. Here, we’ll use Sevalla, a platform with global distribution and streamlined cloud hosting.
Sevalla provides free static site hosting, with worldwide edge delivery and automated deployments via Git. After syncing your code to your repository (GitHub, GitLab, or Bitbucket), simply connect it to Sevalla with a few steps.
Here’s what deployment looks like:
- In your Sevalla dashboard, go to Static Sites and click Add site.
- Pick your Git provider and select your repository.
- Confirm your main branch and set automatic deployment on commit.
- Sevalla identifies your framework automatically (here, React + Vite).
- Click Create site. The build process begins immediately.
In just a few minutes, you’ll have a live website with a complimentary temporary domain.
Helpful tips and other observations
As you develop with Lovable, several helpful features make projects more manageable and enjoyable.
- Free vs. paid options: Lovable has both. Free accounts allow ample room to try things out; paid tiers enable longer prompts and faster responses.
- Minimal refreshing required: Lovable’s UI often refreshes automatically—so content changes in WordPress appear in near real time.
- Edit files directly: Lovable enables quick, in-platform file modifications—great for tweaks or troubleshooting without leaving the workspace.
- REST API or WPGraphQL: For straightforward projects, the REST API does the job. For complex queries or advanced structures, WPGraphQL (via plugin) offers deeper querying options.
- Potential setup hiccups: If you hit connectivity snags, they’re likely related to CORS or REST API permissions. The AI assistant in Lovable can walk you through the resolution process.
- Static caching reminders: Because frontends are static, some changes may not reflect immediately during development. Clear your browser cache or rebuild for major changes.
Expanding the benefits of headless WordPress
Beyond the creative and technical advantages detailed above, going headless with WordPress unlocks a host of practical benefits for different types of organizations:
- Omnichannel content delivery: With a headless architecture, you can repurpose WordPress-managed content across websites, apps, digital signage, and even IoT devices, all from a single source of truth.
- Performance optimization: Decoupling the frontend enables lightning-fast sites by allowing more aggressive caching, static site generation, and modern frameworks that outpace traditional PHP rendering.
- Scalability and reliability: Headless setups can distribute load more effectively and integrate with scalable cloud infrastructure, reducing the risk of slowdowns or downtime during high-traffic periods.
- Enhanced developer experience: Teams can work in parallel—content specialists use WordPress, while developers build out custom frontends using their preferred frameworks and workflow tools.
Common use cases for headless WordPress
- Enterprise marketing sites that demand flawless performance and design consistency across devices.
- eCommerce storefronts needing integration with advanced frontend technologies for personalized experiences or progressive web app features.
- Content-rich publishing platforms where speed and customizable display options are crucial—such as online magazines, portals, or newsrooms.
- Digital product microsites that serve targeted campaigns or landing pages and must be spun up (and down) quickly.
Advanced integrations and extensibility
Headless WordPress also makes it easier to introduce emerging technologies into your stack. For instance:
- Personalization engines: Inject dynamic, personalized content modules sourced from user data services, enhancing engagement without compromising WordPress simplicity for editors.
- Third-party APIs: Seamlessly blend content from WordPress with data from CRMs, eCommerce tools, analytics platforms, or user authentication providers.
- Serverless functions: Use platforms like Vercel, Netlify, or AWS Lambda to add secure backend logic (forms, notifications, processing) without maintaining a traditional web server. You might also enjoy this related read → Best WordPress Chrome Extensions to Boost Productivity
Security considerations in headless setups
Separating frontend and backend yields notable security improvements, such as:
- Reduced exposure: The core WordPress application—and its admin area—remains hidden from public access, lessening the attack surface.
- API authentication: Implement token-based access, rate limiting, and detailed monitoring to control how content is consumed and prevent misuse.
- Lower plugin risk: Frontend is unaffected by many legacy vulnerabilities tied to poorly coded plugins or themes, as only approved APIs are exposed.
Nonetheless, security best practices still apply—keep WordPress, plugins, and any integration logic updated, and monitor all third-party dependencies for vulnerabilities. Also check out this related article → WordPress for Enterprise: Why Your Enterprise Business Should Use WordPress
Testing and quality assurance
Quality assurance is critical when building modern web experiences. Consider these headless-specific testing strategies:
- Automated integration tests: Ensure the frontend correctly fetches, renders, and updates data from the WordPress backend—especially when schemas change or plugins are added.
- Performance audits: Use tools such as Lighthouse or WebPageTest to analyze load times, interactivity, and responsiveness of the decoupled frontend.
- Accessibility checks: Validate that dynamic components render accessibly (screen reader compatibility, color contrast, keyboard navigation), maintaining WCAG compliance as you iterate designs in Lovable.
Community tools and resources
The headless WordPress ecosystem is rapidly evolving, with new tools and starter kits released frequently. Here are a few to accelerate development:
- WPGraphQL: A popular plugin exposing a GraphQL endpoint, ideal for granular queries when connecting with Lovable or other modern frontends.
- Headless frameworks: Solutions like Next.js, Gatsby, and Astro work seamlessly as alternative or supplementary frontends for advanced scenarios.
- Content modeling plugins: Tools such as Advanced Custom Fields or Pods let you create structured data models within WordPress, improving API output and frontend flexibility.
Further learning and best practices
- Follow WordPress headless case studies from agencies and enterprise teams on developer blogs and GitHub repos.
- Join communities, such as the Headless WP Slack, for peer support and insights on new releases.
- Explore Lovable’s documentation or guided tutorials to unlock more advanced AI-powered development flows.
Summary
Headless WordPress is rapidly becoming a flexible environment for merging robust content management with innovative design capabilities. Using WordPress for content and Lovable’s AI-driven approach for the frontend makes it possible to move swiftly from idea to live site deployment.
As AI increasingly influences how we work, headless WordPress stands out as a versatile option for those who value speed, control, and flexibility.
If you’re looking to unlock the possibilities of headless WordPress on your next build, start with a reliable hosting foundation that supports speed and uptime—ensuring your project performs at its best.